Hole by Hole
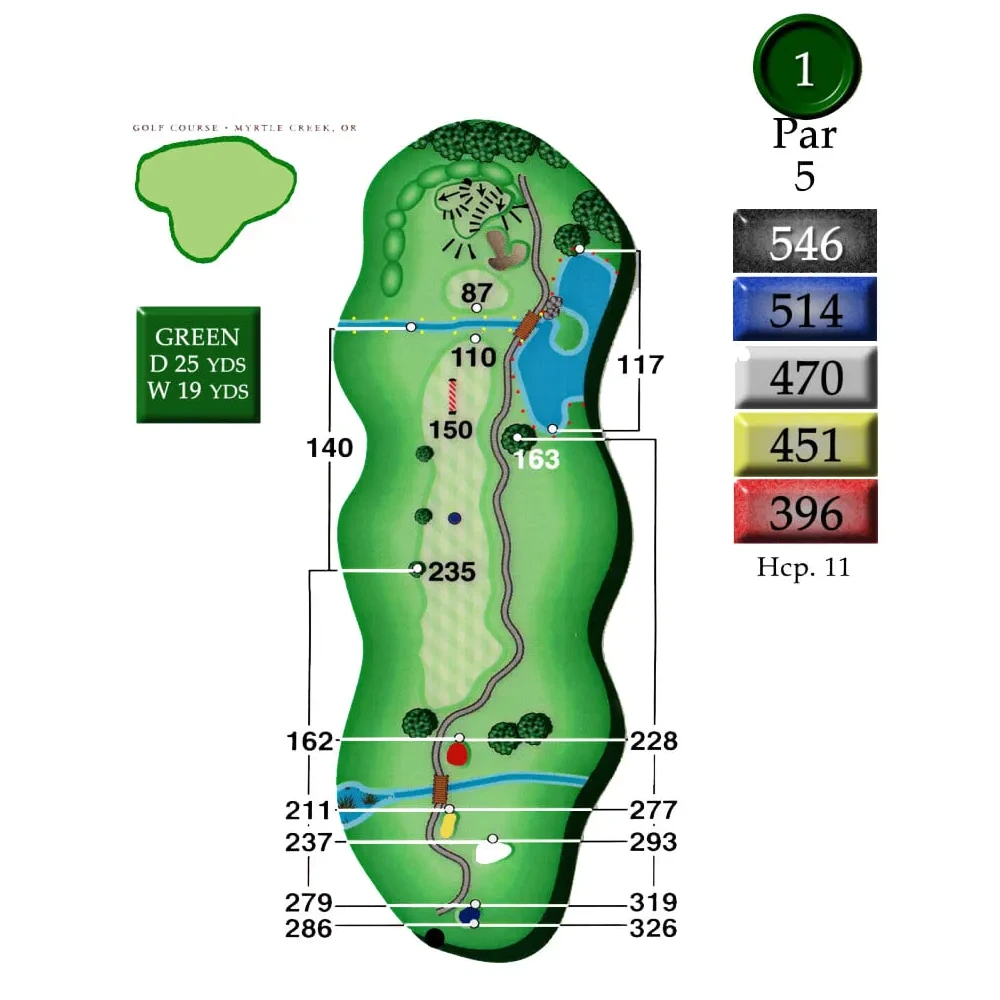
Hole 1
Par 5
A relatively short par 5. Good warmup hole. You will want to stay center or left of center off the tee, otherwise large oak tree to right of fairway will block your approach shot.
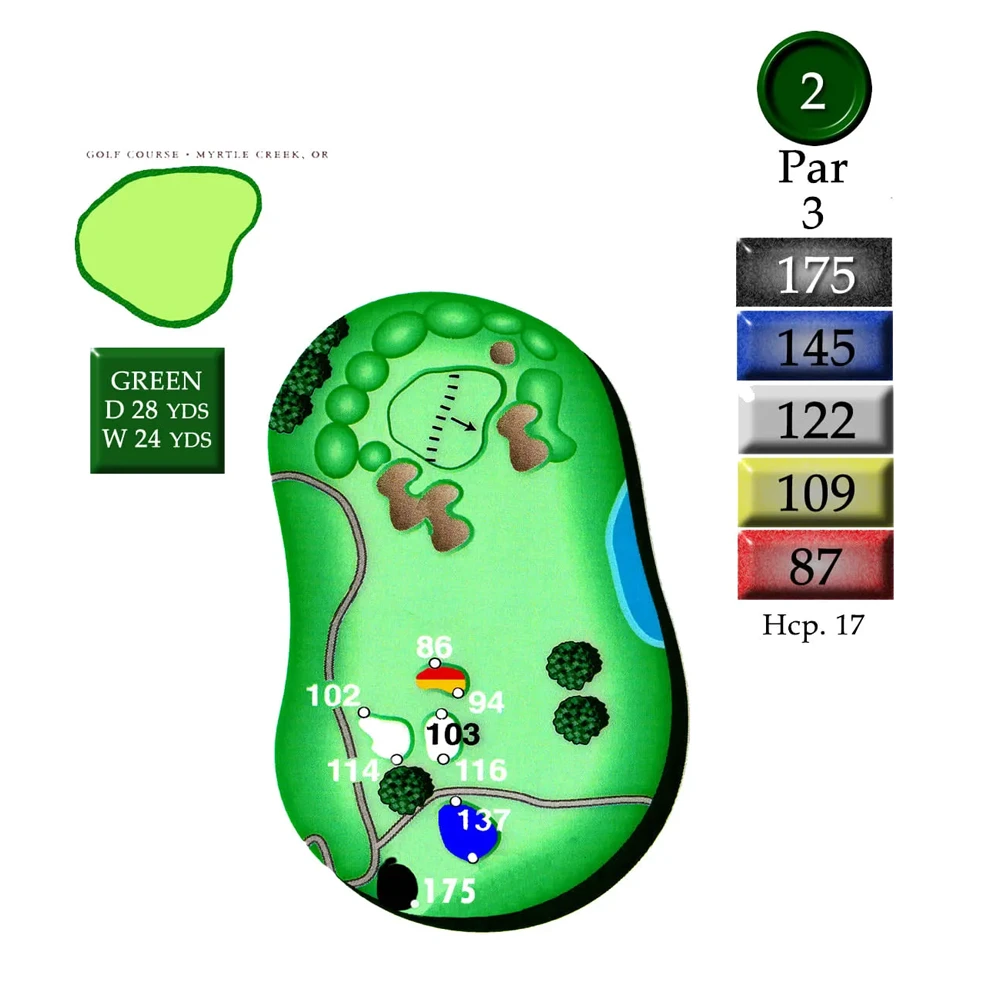
Hole 2
Par 3
Short one-shotter that is well-bunkered. Best to aim for middle of green, taking the left bunker out of play.
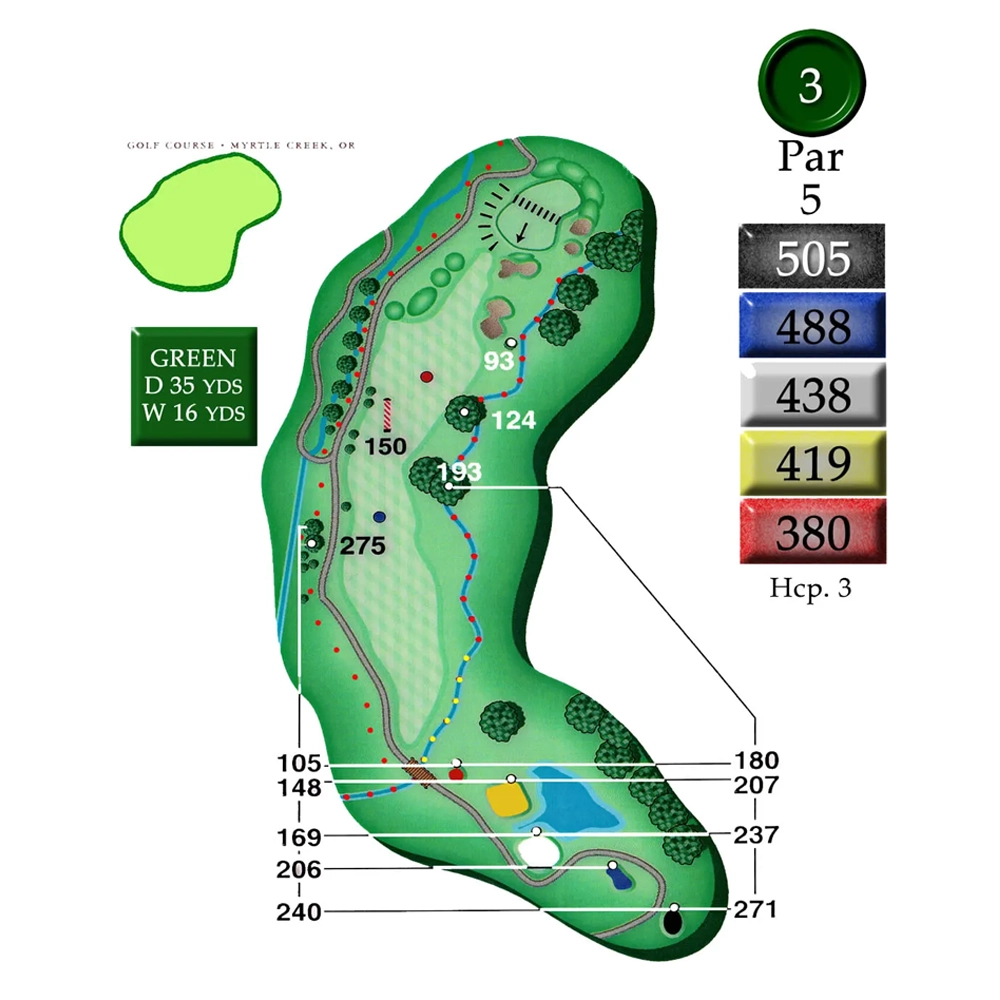
Hole 3
Par 5
This is a short par 5 that can jump up and grab you. Seasonal creeks both left and right of fairway make an accurate tee shot critical. Favor the left side of fairway on this hole.
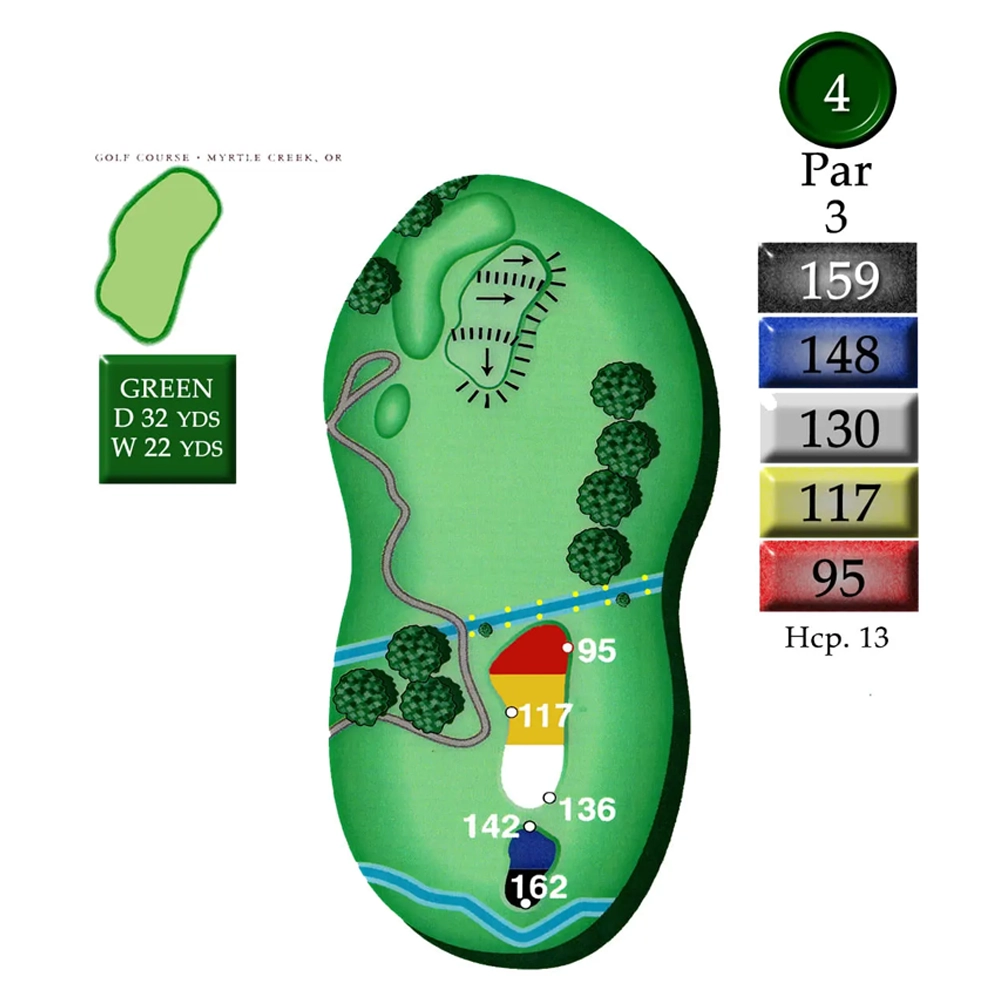
Hole 4
Par 3
Combination of elevation change and depth of green make club selection on this hole most important.
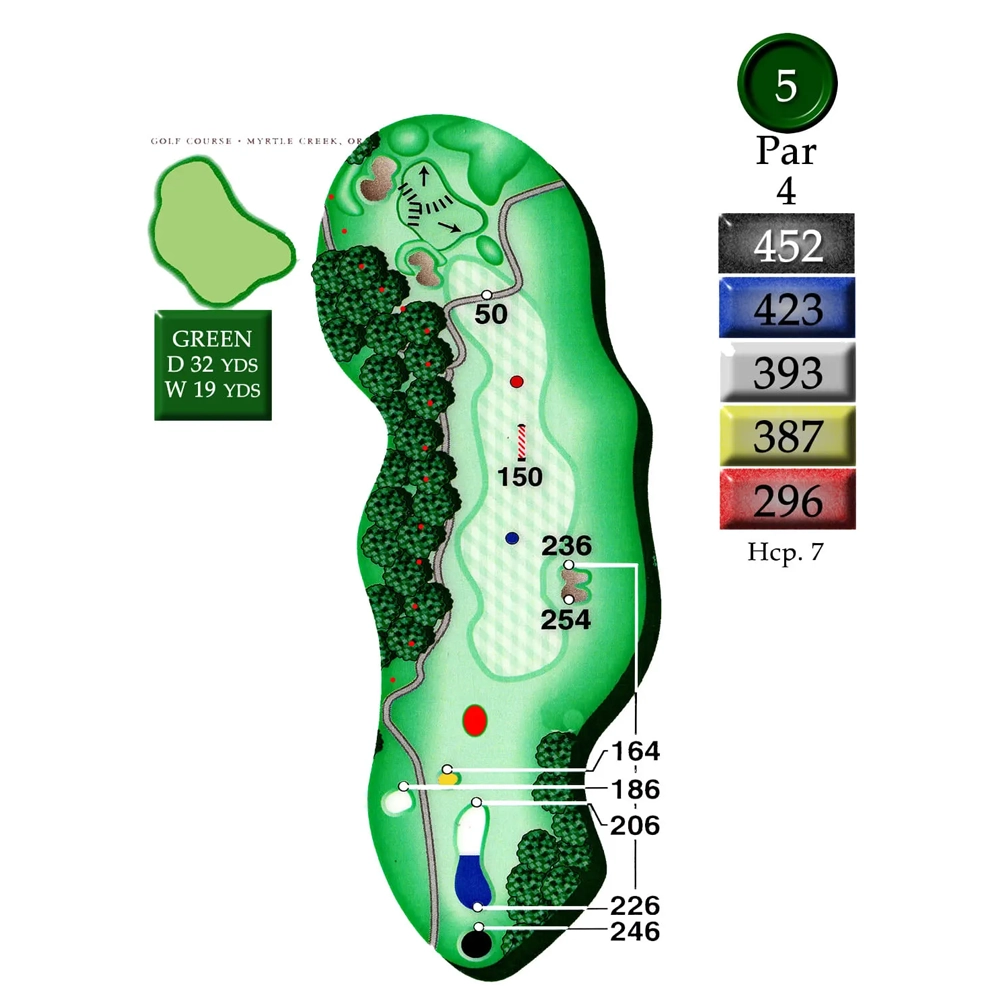
Hole 5
Par 4
The first of three healthy par 4’s in a row. Best to aim for right side of fairway off the tee.
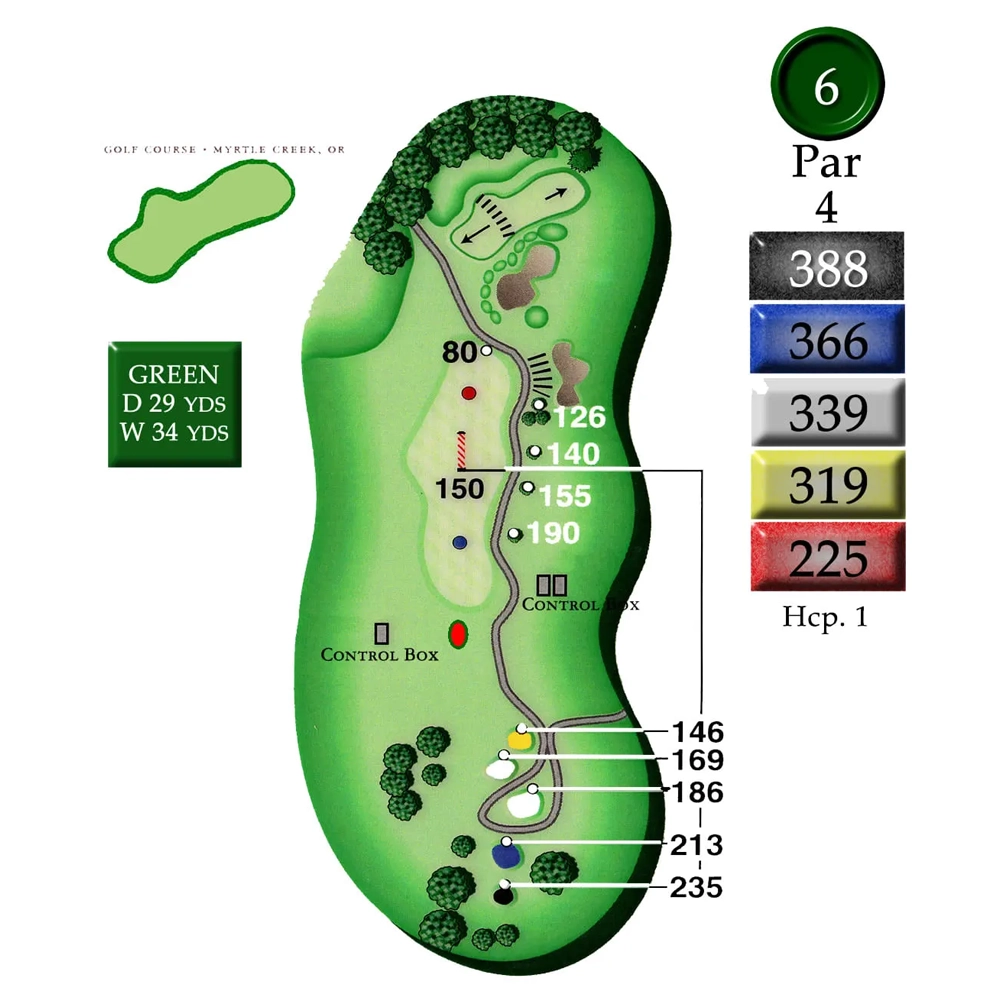
Hole 6
Par 4
This hole plays longer than yardage indicates. Second shot is uphill to a very shallow wide green with a ridge splitting the green in the middle. Better to have a little too much club than not enough.
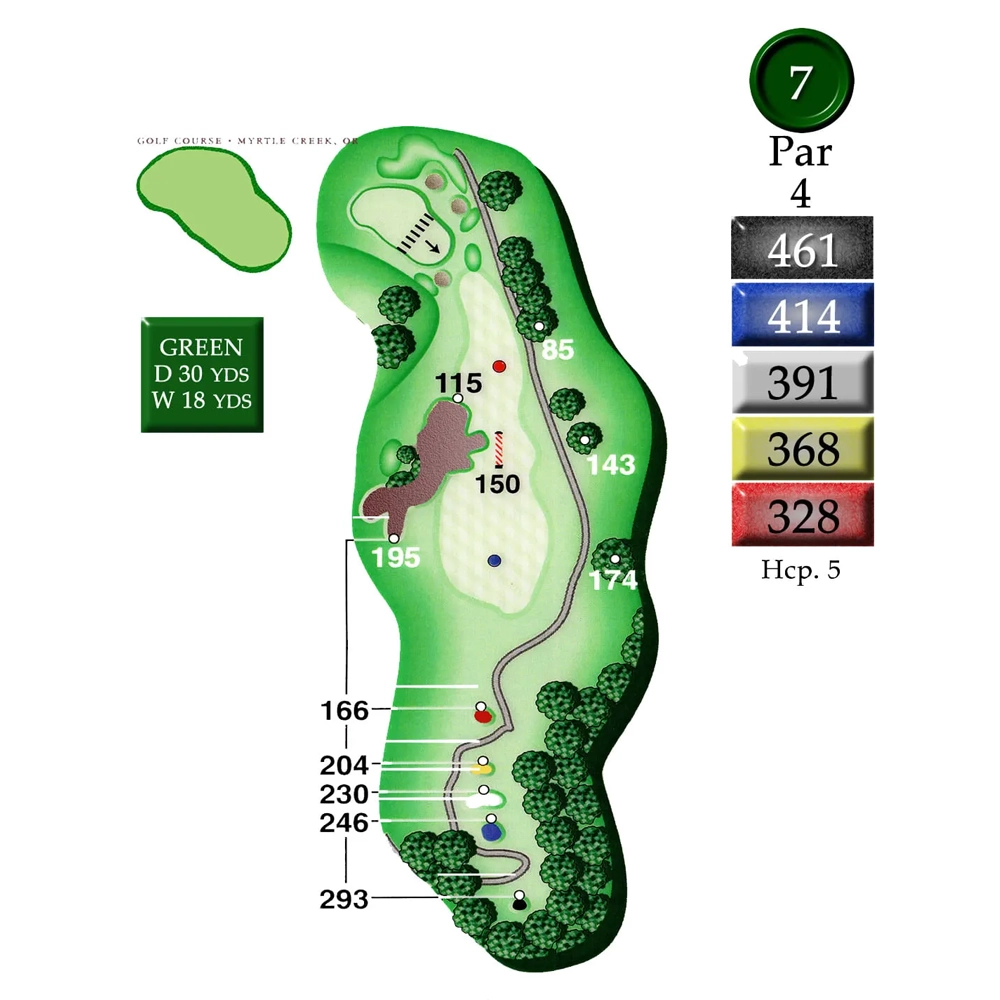
Hole 7
Par 4
This is our number handicap hole. Favor right side of fairway for best angle into the green. Narrow landing area front of green makes long approach shots a gamble. Consider laying up short of green.
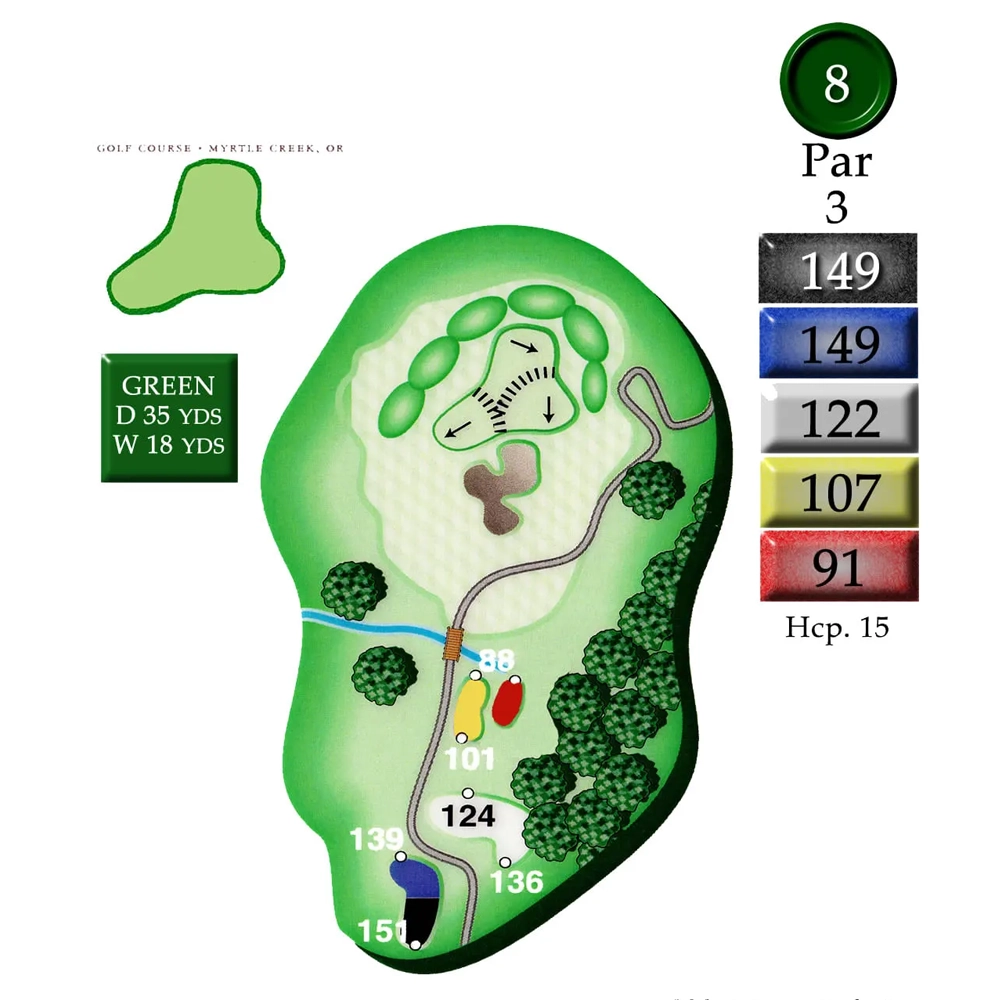
Hole 8
Par 3
A relatively short par 3. Front bunker will gobble up most shots hit short of green. Severe undulation in green makes an accurate tee shot very important.
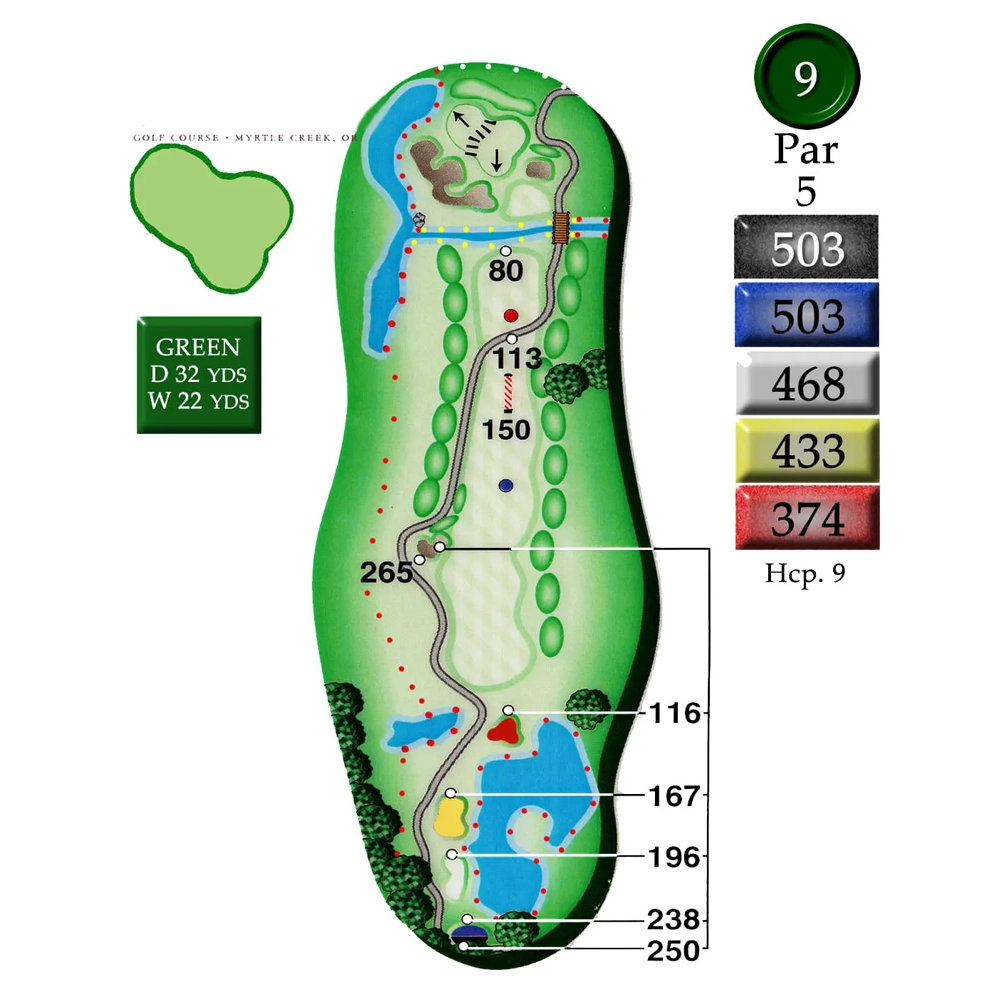
Hole 9
Par 5
Reachable par 5 if you can drive the hill. Landing area for second shot is not visible. Aim for the two evergreen trees on hillside in the background. Bunker left of green gathers a lot of errant shots.
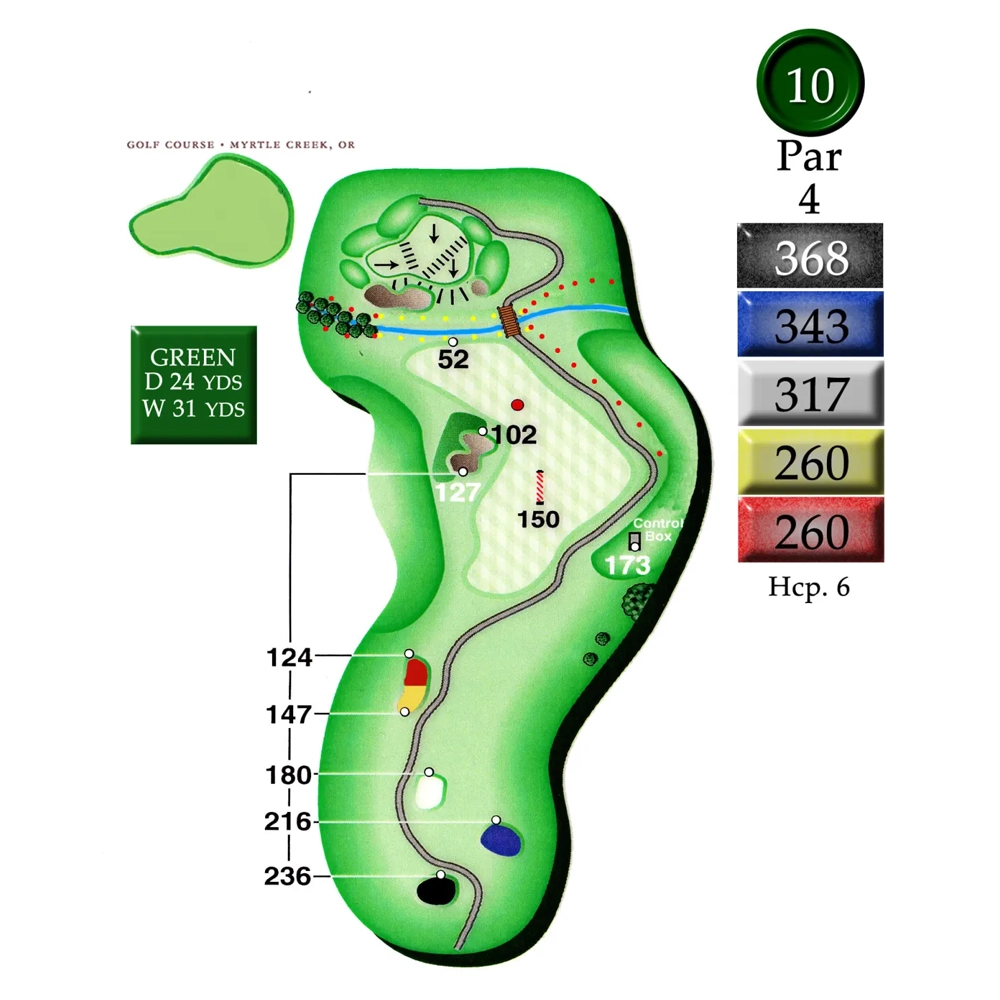
Hole 10
Par 4
Aim for the 150 marker. Long hitters may want to layup with a fairway wood or long iron. Second shot crosses a deep ravine to a two-tiered green. Play second shot aggressively, you don’t want to be short!!
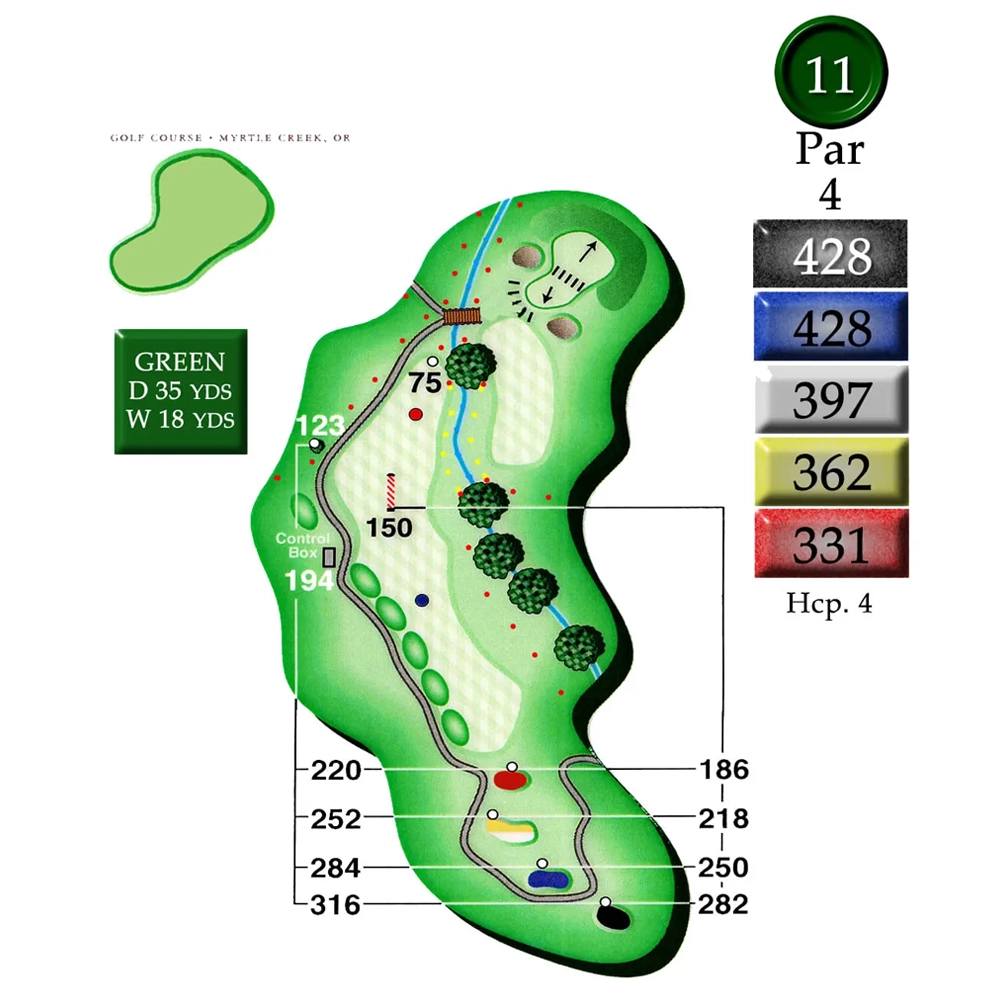
Hole 11
Par 4
Best bet is to hit straightaway and cross ravine on your second shot. Medium to long hitters may want to use a fairway wood or long iron off the tee to guard against hitting it through the fairway.
Hole 12
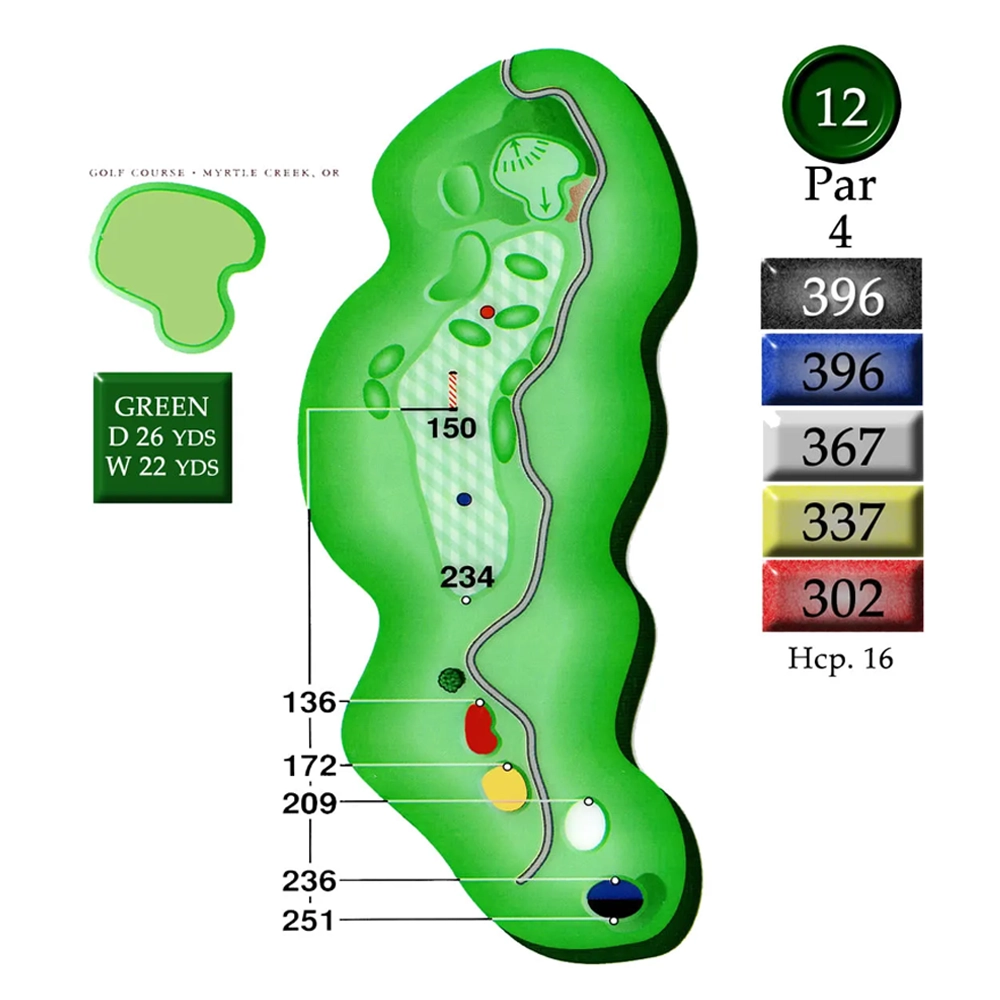
Par 4
This is a slight dogleg to the right, where the green is only visible on your second shot. The 150 stake, or slightly right of it, is a good aiming point. Trouble on your second shot if you go long or right.
Hole 13
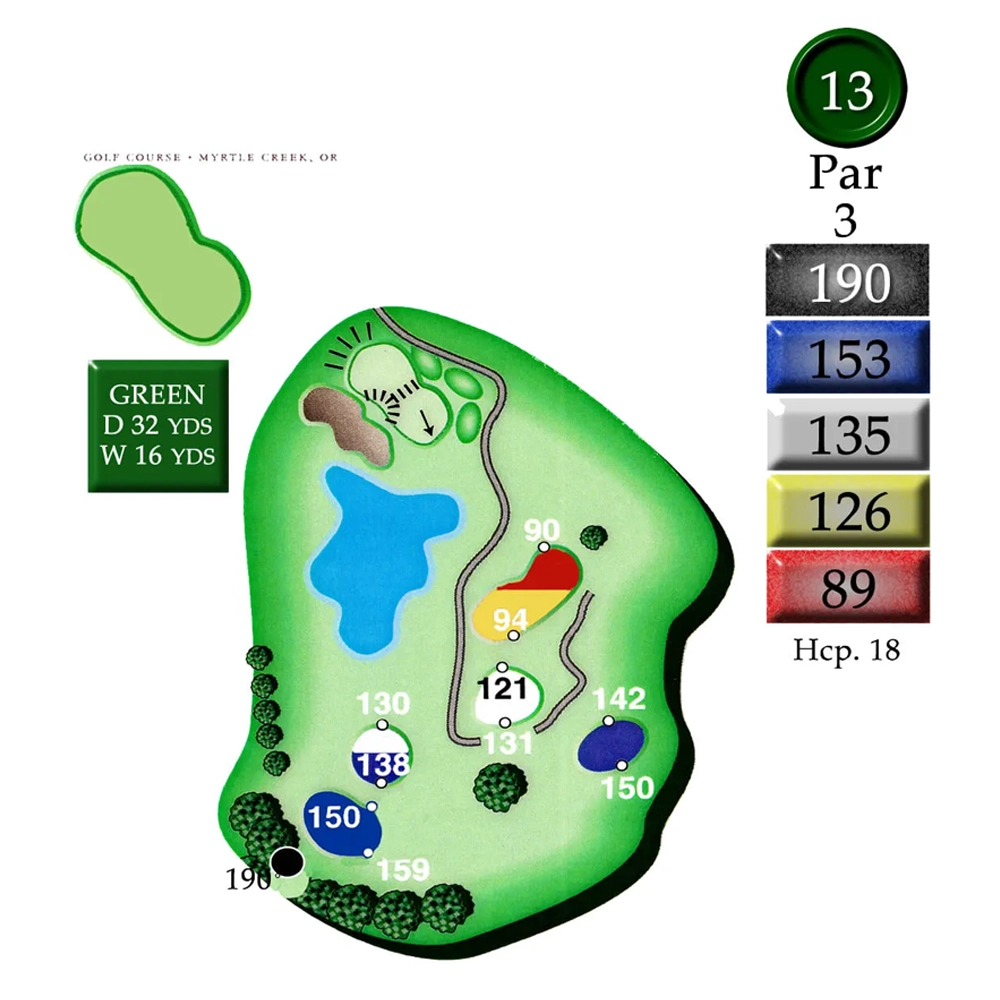
Par 3
Due to elevation change this short par 3 should play a little shorter than yardage indicates.
Hole 14
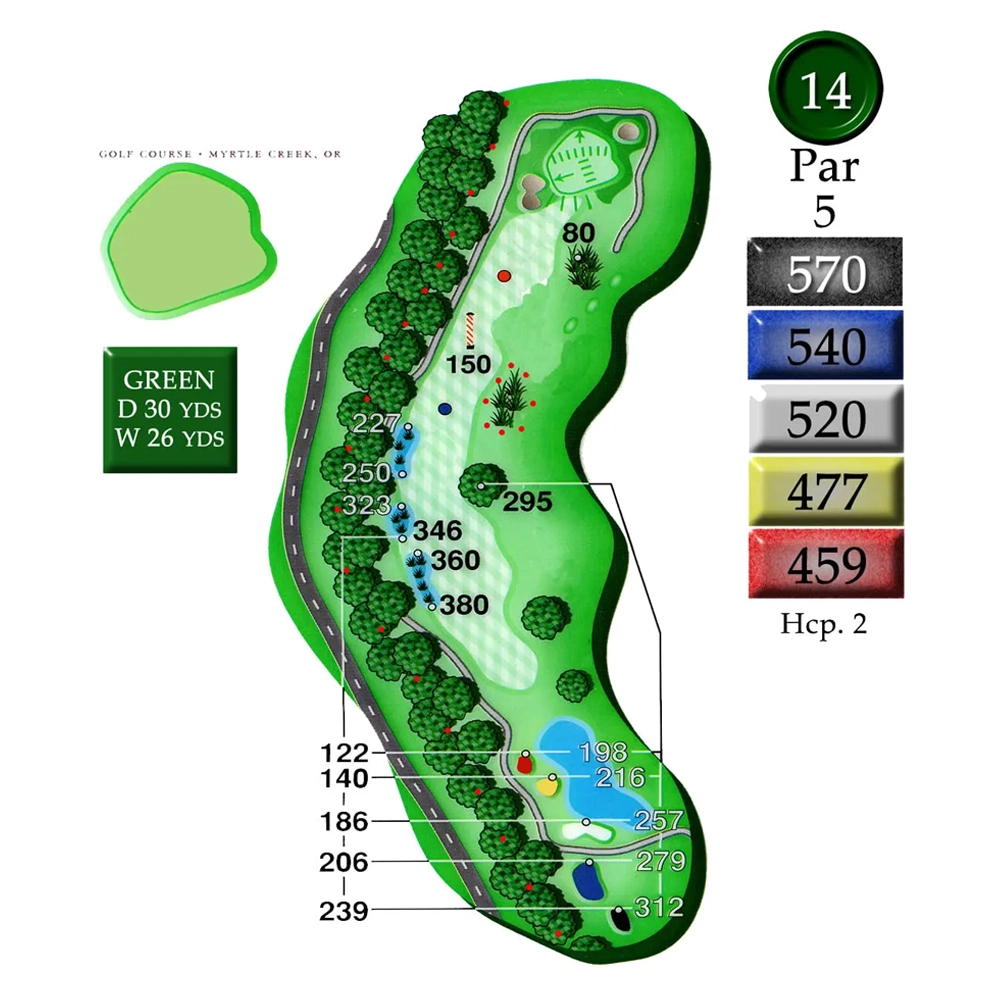
Par 5
This is the longest hole on the course. Oak tree on the right corner of fairway makes cutting the corner more challenging. However, a well-placed drive will shorten the hole slightly. Second shot should favor right side of fairway.
Hole 15
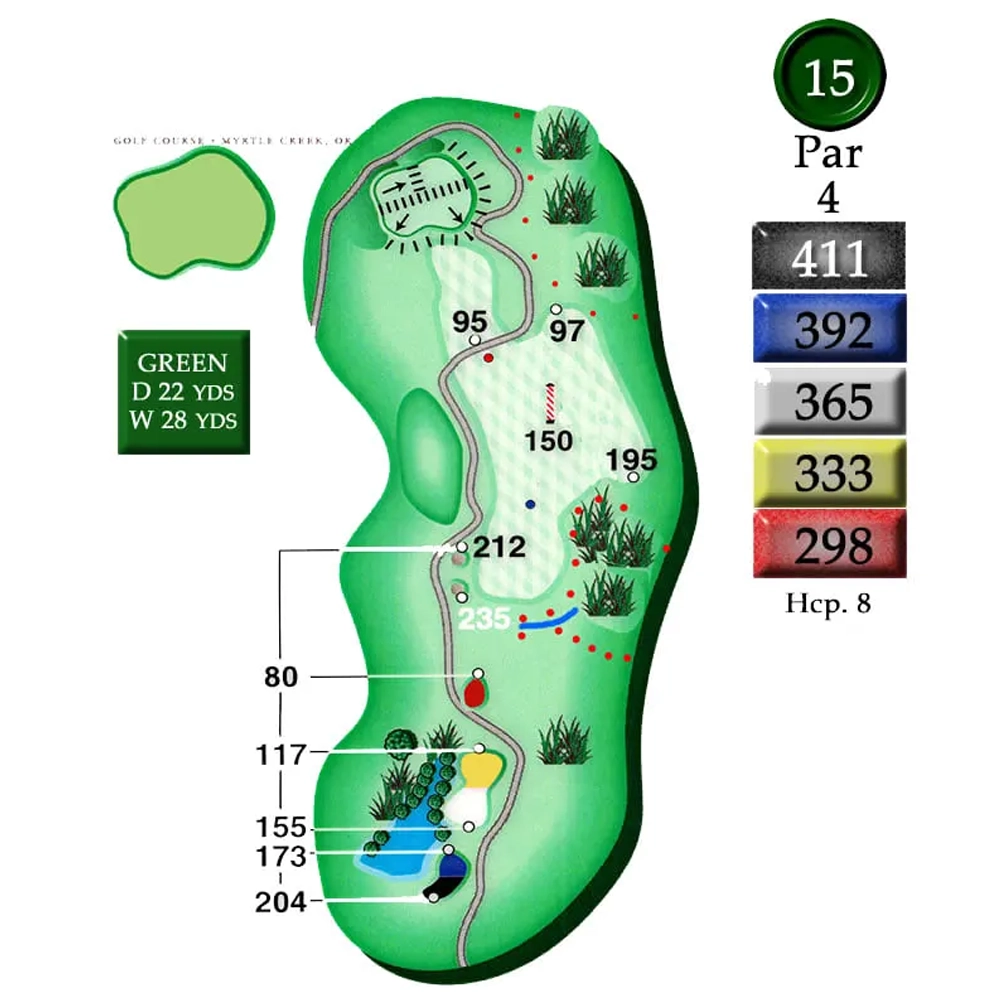
Par 4
Ideal tee shot is at or just left of 150 yard marker. Tee shots hit right may leave you a second shot with a side hill lie and a blind shot into green. Do not miss second shot to right of green.
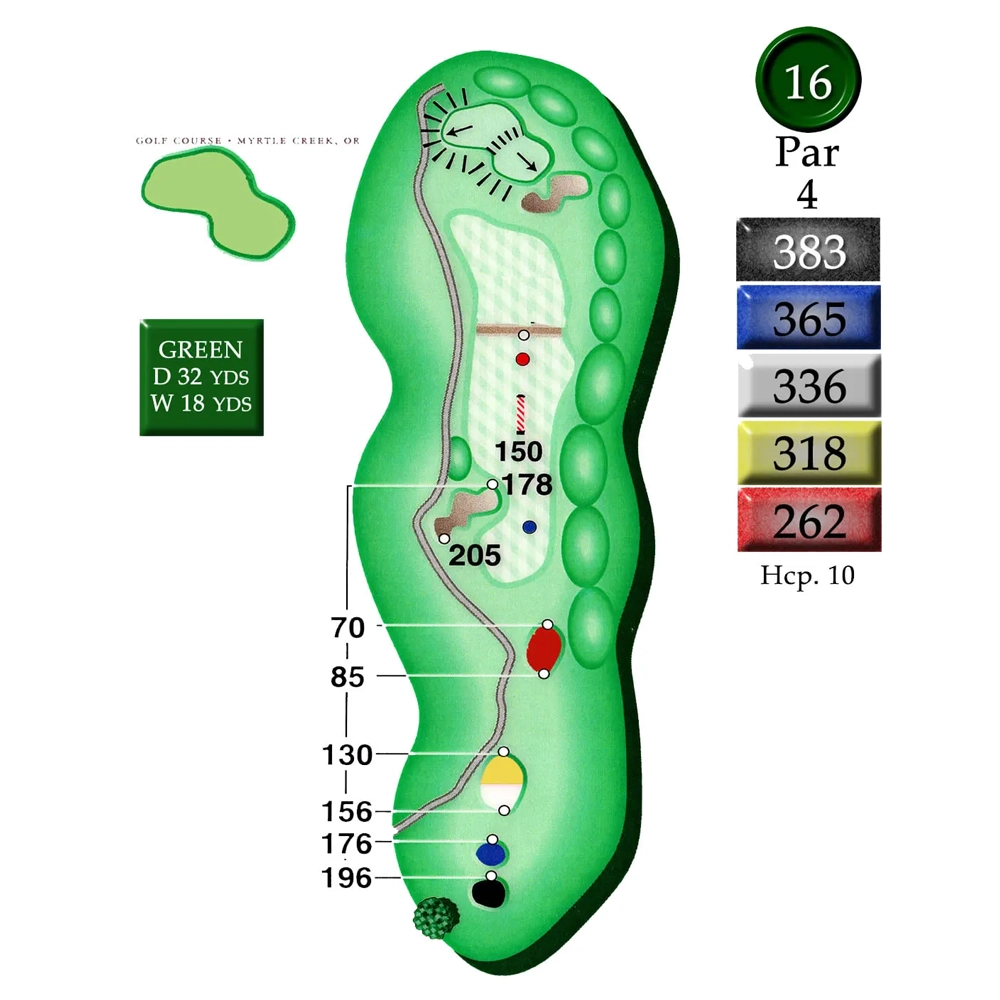
Hole 16
Par 4
Blind tee shot. Aim at 150 or slightly right of it. L-shaped green is approached a little friendlier from the right hand side.
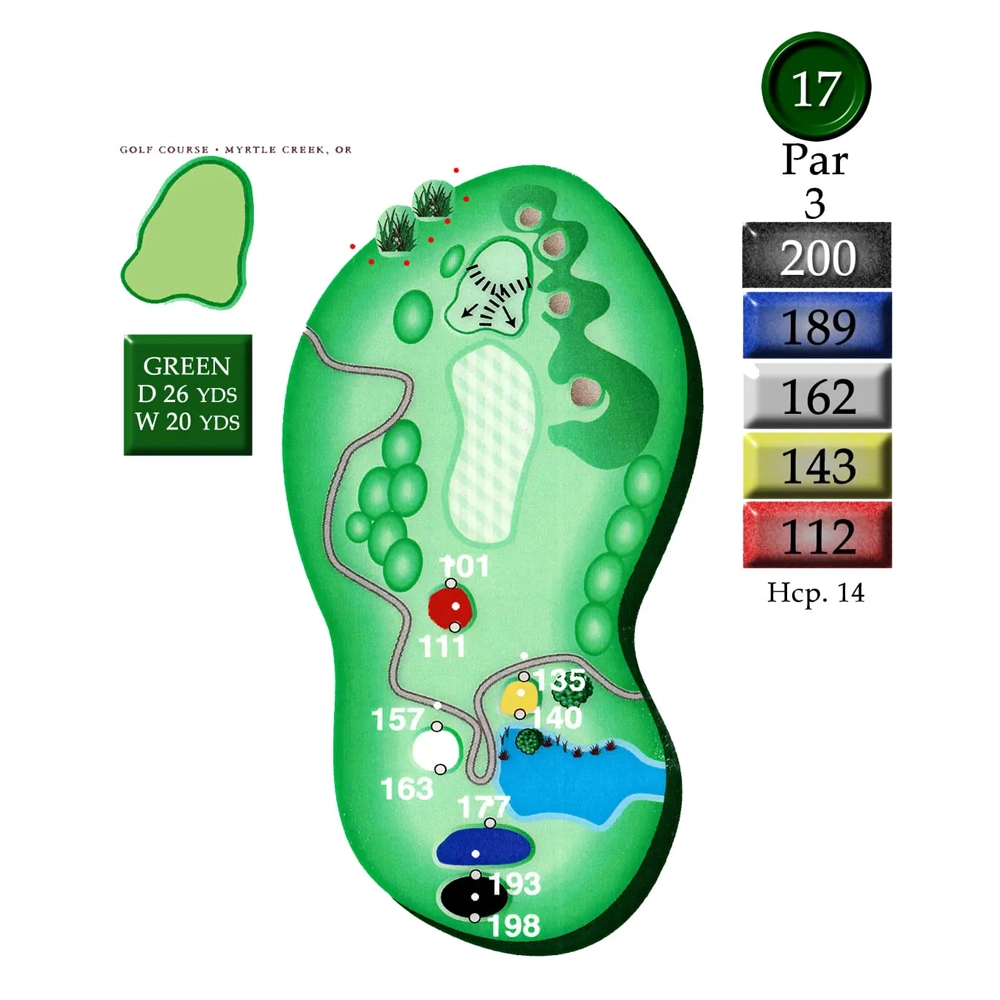
Hole 17
Par 3
Our longest par 3 with lots of undulation in the green. Putts tend to get away as the slope carries them towards the front left portion of this green.
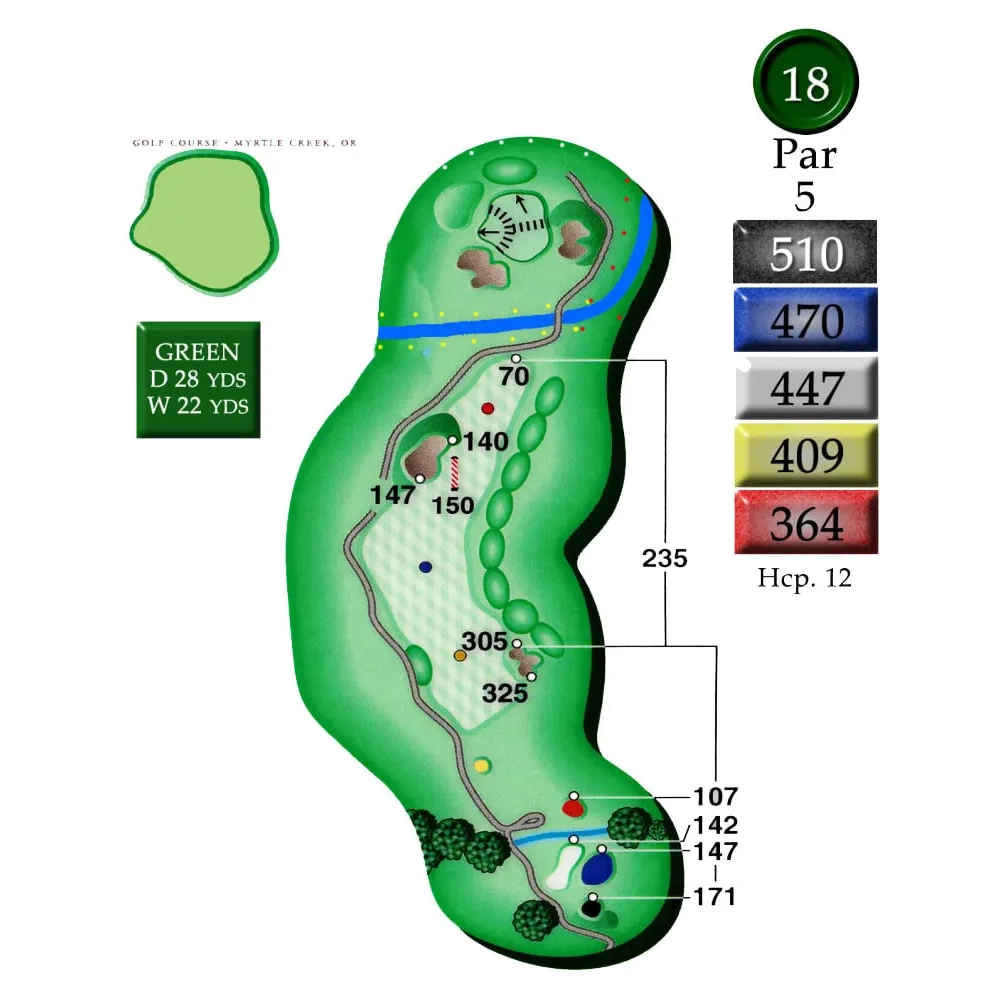
Hole 18
Par 5
A good finishing hole and a good chance to recoup a stroke or two as it’s very reachable in two shots. Tree in the distance from the tee is a good aiming point. If laying up on second shot there is a drainage ditch that crosses the fairway at approximately 75 yards out. This putting surface has severe undulations.